When on the Water, Wear a Life Jacket!

When on the Water, Wear a Life Jacket!

There’s no excuse not to wear a life jacket on the water, and as your insurance agent, we strongly encourage you, and the passengers on your boat to wear one when you are on the water. Boaters enjoy the feel of sun and spray. So, it’s tempting to boat without wearing a life jacket. Regardless of your swimming ability, its important to wear a life jacket.

Life jackets are available in a wide variety of shapes, colors, and sizes. Many are thin and flexible. Some are built right into fishing vests or hunter coats. Others are inflatable and compact as a scarf or fanny pack until they hit water, when they automatically fill with air.

Things to Know:

  • The best life jacket is the one you will wear.
  • Life jackets are designed to keep your head above water and help you remain in a position that permits proper breathing.
  • Some styles of life jackets are not intended for weak or non-swimmers (read the label and be honest).
  • To meet U.S. Coast Guard requirements, a recreational vessel must have a U.S. Coast Guard Approved life jacket for each person aboard.
  • Adult-sized life jackets will not be suitable for children.
  • When worn correctly, a foam filled life jacket will fit snuggly, and will not allow the life jacket to rise above the wearer’s chin or ears.
  • Foam filled life jackets should be tested for wear and buoyancy at least once a year. Waterlogged, faded, or otherwise damaged life jackets should be discarded.
  • Inflatable life jackets should be maintained per the manufacturer’s instructions.
  • Most adults only need 7 to 12 pounds of buoyancy to keep their heads above water.
  • If you are boating with your pets, you should have a life jacket for them as well.

Failure to wear personal flotation devices (PFDs) or life jackets remains one of the largest contributing factors associated with boating deaths.  78% of  boating incidents occurred during recreational activities such as fishing or power boating. Help keep yourself and those on your boat safe and enforce that everyone wears a life jacket!

We love to spend time on the water with our family, friends and pets, but safety comes first. Taking time to review these safety precautions about life jackets, might just save a life!  We are looking forward to providing insurance coverage for all your boating needs.

Source: https://uscgboating.org/recreational-boaters/life-jacket-wear-wearing-your-life-jacket.php and https://pleasurecraftoperatorcard.info/in-2000-boating-incidents-accounted-for-one-third-of-the-water-related-deaths-in-canada-147-out-of-a-total-of-472/

Hiring a Contractor for Home Updates

Hiring a Contractor for Home Updates

If you own a home, then chances are at some point you will need to hire someone to do repair work on your home.  At (Agency Name), we know that hiring a contractor or handyman to perform work on your home often comes with risks. Below are nine things for you to consider before you hire a contractor.

  1. Get recommendations.  Ask your friends, family and neighbors if they have recently used a contractor, handyman, plumber, heating/air company, or an electrician and, if so, would they use that person or company again.  Ask your friends and family whether their project was completed on time and within their budget.  Find out whether the contractor’s estimates were accurate.
  2. Consult the internet.  Internet reviews from satisfied, or unsatisfied, customers can tell you a great deal about a potential contractor.  Review several websites that rate contractors and see what others have said about contractors you are considering.  Also, check with the Better Business Bureau to see if any complaints have been lodged against potential contractors.
  3. Ask for references.  Request the names and phone numbers of some recent clients for whom your contractor has completed a similar job.  Ask the references if they were happy with the finished product.  Ask whether anything has come up since the job was completed and if the contractor addressed the issue.  Find out whether the final cost was reflective of the contractor’s estimate and whether the job was completed on time.
  4. Find out if your contractor is licensed and insured.  You want the contractor to be insured ad to show you proof of insurance. If they aren’t insured, refer them to us for an insurance package!
  5. Get Multiple Estimates.  Get two to four estimates from different contractors.  Remember the old adage; you get what you pay for.  This doesn’t necessarily mean that you have to hire the most expensive contractor, but if one estimate is significantly less than all of the other estimates, that is a red flag.  That contractor may plan to use less quality materials or cut corners.  The contractor may have also intentionally underbid the job in an attempt to obtain your business, only to increase the price later.
  6. Get it in writing.  Never pay a contractor before you have a written contract outlining everything the contractor is going to do to your home.  The more specifically the work is identified, the better.  The contract should also specify the cost of all materials that will be used and provide start and completion dates.  Find out whether the contract price is an estimate, which may change during the course of the project, or a total cost for completion.  If the contract price is an estimate, then make sure the contract specifies that the job cannot exceed a specific amount.  Additionally, specify in the contract that no changes can be made, except in writing.  Make sure the contractor is providing a warranty on labor and materials and that it is spelled out in your contract, including: who you need to contact to make a claim under the warranty; any limit on the amount of the warranty; and the length of the warranty.  The contract should also spell out all of the contractor’s duties.  For example, if you are having flooring replaced, then the contract must specify whether the contractor will be moving furniture and putting it back once the job is complete.  You will also want to specify whether the contractor is responsible for clean-up and disposal of all construction materials at the conclusion of the project.
  7. Set a payment schedule in the contract.  You never want to pay a contractor more than 50% up front.  Depending on the size of the job, your initial payment is ideally going to be no more than roughly 30% of the total cost of the project.  The contract should specify that each subsequent payment is only due after certain phases of the project have been completed and set out a time frame for each such phase to be completed.  If a bank will be providing a construction loan, make sure you have the right to approve each disbursement.  If the time comes for your next payment, or your contractor demands a subsequent payment from you, but the previous phase has not been completed, then you have the right to refuse payment until the contractor completes the phase for which you have already paid.  Always pay your contractor in a way that is traceable, i.e. with a check, credit card, or debit card.  Do not make the final payment to your contractor until you have verified that all work has been completed and is acceptable.
  8. Extras.  Be aware that when you ask for upgrades or additional work, you are going to have to pay for that additional work.  Often, once a project gets started, it is tempting to ask for upgraded materials or some extra work to be done.  If your contractor agrees, then you should find out how much the extra work or material is going to cost and get it in writing before the work is done.
  9. Maintain good records.  Keep a copy of your contract, all payments you have made, any additions or edits to the contract, and all correspondence with your contractor.  Even if you have had a conversation in person or over the phone, make sure you document that conversation with an email or letter to you.

Hiring the right contractor will ensure that your project is completed successfully, as well as on time and on budget. All-together, this process can seem daunting. However, the time you spend searching and the detail you put into your contract will be reflected in the final product. It would be a headache to work with someone you can’t rely on. You could find yourself with an unfinished remodel or a maxed-out budget. Allow yourself the time to do your research and ask the necessary questions.

We insure many local contractors, and we would be happy to refer you to them. Just let us know what you are looking for and we can provide the reference. Once you have the updates complete, please let us know so we can update your insurance as well.

Source: https://hutchenslawfirm.com/blog/civil-law/smart-homeowners-9-tips-you-hire-contractorand https://seacoastconstruction.net/7-tips-for-hiring-a-reliable-general-contractor/and https://www.thespruce.com/tips-for-hiring-a-contractor-4156976


Garage Clean Out Tips

Garage Clean Out Tips

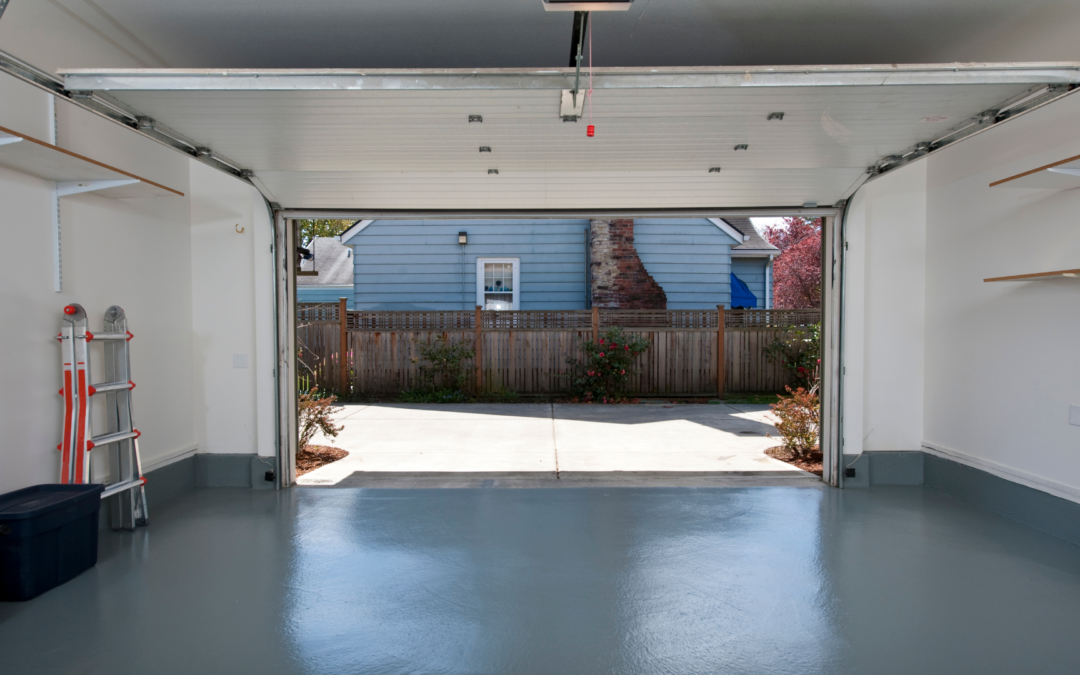
Imagine a world where you could actually park inside your garage. What if we told you that dream could be a reality with just a weekend’s worth of work?

We rounded up expert garage cleaning tips and turned them into a five-step plan you can use to get your garage organized quickly and painlessly.

  1. Take Everything Out

The first step to decluttering your garage is to find out what’s in it. Pick a section of your garage to start with and pull everything out onto the driveway to sort through. Besides making it easier to work, this garage cleaning tip will also allow you to see what space you have to work with and what types of storage might work best when it’s time to organize the items you’re keeping.

  1. Decide on Your ‘Keep’ Criteria

Once you’ve pulled everything out, it’s time to set some ground rules for deciding what to keep. This garage cleaning tip will speed up the process by preventing you from agonizing over each individual item. When deciding what to keep and what to throw away, ask yourself: “Is this item in the garage for a reason, or because I didn’t know what to do with it?” If it’s the latter, either find a use for it or get rid of it.

  1. Decide What to Do with the Garage Clutter

Whatever doesn’t make your “keep” list is, by default, clutter. Don’t let it hang around your garage any longer.

With your “keep” items set aside, start going through the rest of the stuff you pulled out of the garage. Identify items you’d like to sell or donate first. Have plastic bins, cardboard boxes or bags on hand so that you can pack up donation items as you work and stash them somewhere out of the way.

Bag up or box up junk that doesn’t make the “keep,” “sell” or “donate” piles. If you’ve rented a dumpster for your weekend cleanout, toss the garbage bags into the container as you go.

  1. Deep Clean the Space

While you’ve got your garage entirely cleaned out, it might be a good idea to scrub it down before putting things back. In general, the best way to clean up a garage is from top to bottom. Start by dusting off and wiping down the tops of your cabinets, shelves and refrigerator if you have one. Then, wipe down your garage walls and the doors of your fridge and cabinets with a warm, damp cloth and a mild household detergent. Next, sweep the floor to get rid of the dust you’ve shaken loose. Finish up by mopping and hosing off the floor. Allow the floors two to four hours to dry before putting things away. As your insurance agent, we want you to stay safe. A clean garage is a safe garage!

  1. Get Organized

Now that you’ve whittled your inventory down and finished your garage cleanup, seize the opportunity to keep clutter from building back up. So, what’s the best way to organize a garage? It depends on what exactly you need to store.

Cleaning out your garage not only provides the benefit of a clean space but it also works in your favor when it comes to your insurance! Here are reasons why to clean out your garage space:

  1. Safe from the elements- rain, snow, wind

This is probably one of the most obvious, but rain, snow, wind and other weather elements are enemies of a car’s exterior. They can leave dirt and acid on a vehicle that can cause significant damages to the exterior, like rust and a weakened top clear coat.UV rays from the sun can damage a vehicle in ways most car owners don’t consider. Extreme hot and extreme cold can both lead to deterioration of the inside and outside.

  1. Protects from dings and scratches from elements or other vehicles

Hail and falling tree branches are just a couple examples of ways a car can get damaged from simply being outside. Dents, scratches, and broken windows are all possible exterior problems that can occur when a vehicle is left outdoors.

  1. Less likely to have theft or vandalism

Cars are a huge investment, and for most they are one of the most valuable things they own. Parking outside leaves a vehicle exposed to vandalism and theft. A garage helps eliminate the temptation for those that want to harm a vehicle in any way.

  1. Lower insurance costs

That’s right, some insurance companies offer lower policies for people who store their vehicle in a garage. Saving money is always an advantage.

  1. Keeps vehicles exterior looking great

Believe it or not, mechanics can tell if a car is stored in a garage or outside. Vehicle exteriors are kept in much better condition when stored in a garage which can lead to greater resale values.

  1. Engine stays lubricated / Coolant stays warmer, heat/AC comes on faster

Because a garage keeps a vehicle warm, the fluid and oil are kept in a stable condition which leads to an engine that runs better than one that is kept outside. Also, with a warmer car comes faster AC and heat. On cold days, the heat will warm up faster than being out in the elements. Same is true for extremely hot days.

  1. Visibility is ready to go

Forget the ice scraper or dewy windshield. Parking in a garage helps keep windows clear of weather and condensation so there is no need to ride with one head out the window.

Parking a car in the garage seems to be a thing of the past. Garages are used for a lot of other things like storing junk or home workshops, but parking in the garage is one of the best things for a vehicle.

Pintler Insurance is an independent insurance agent located in Montana. We can provide coverage from many insurance carriers so you receive the home insurance for your budget and needs!

Source: https://www.budgetdumpster.com/blog/how-to-clean-out-your-garage-and-conquer-the-clutter-for-good/and https://www.mrcleancarwash.com/blog/10-benefits-of-parking-a-car-in-a-garage/